

From a photo conversion to a cross-stitch pattern
Photo conversion is one of my favourite projects as they’re unique and so personal.
As I wrote in my first post, My cross-stitching journey, I threw myself into cross-stitch at the beginning of the first lock-down.
I had a great time working on the kit I bought online, as I fell in love with the design. But I then wanted to cross-stitch a unique and meaningful pattern and my cat Figaro was the perfect subject for a photo conversion to cross-stitch.
I had many photos of him but one, in particular, caught my interest; he was nestled in the hollow of a cascading plant. I remember it was a very warm day and Figaro was looking for shade.
The foliage was dense, but the sun was piercing through the leaves and created a whole palette of silvery greens and tender yellows that perfectly matched his eyes.
However, producing a photo conversion of Figaro implied certain choices if I wanted to retain as much detail as possible.
- I used Aida 18 count; it’s my favourite count for photo conversation, as I find it a good compromise in terms of details and pattern size.
I could have used Aida 20 to reproduce more detail, but even a higher count fabric won’t have made a huge difference in my finished project.
Each inch of a photo is indeed made up of thousands of pixels that are impossible to reproduce in cross-stitch, as the number of stitches per inch on the fabric is obviously not a match!
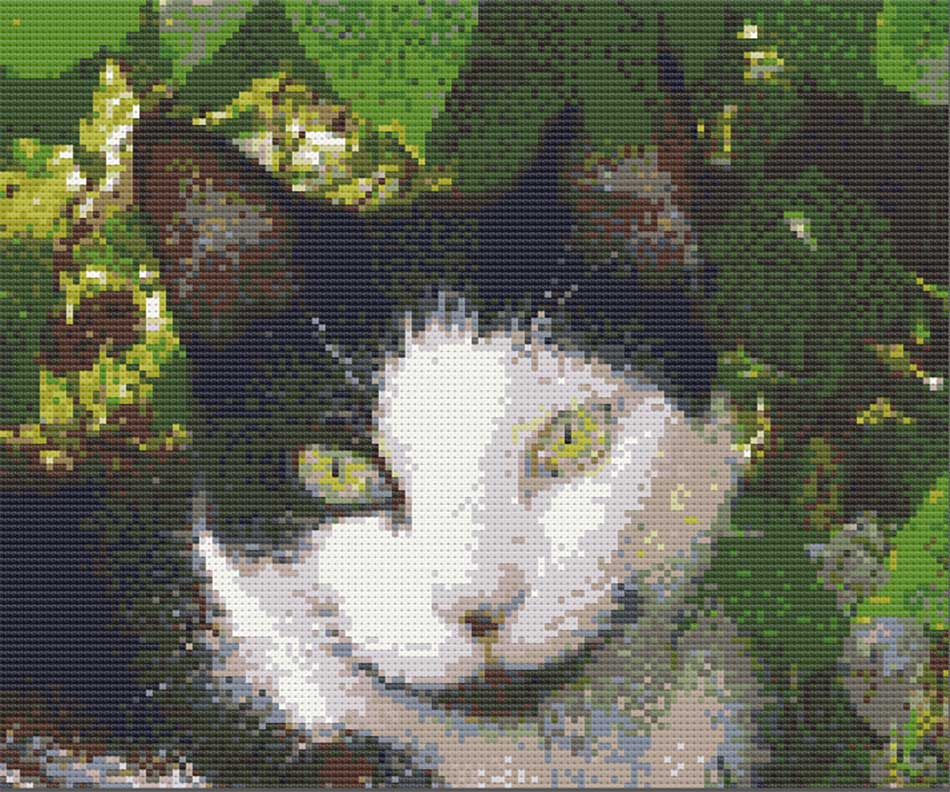
- Back to my photo of Figaro: the background foliage was very busy, so I needed to crop the photo as much as possible to retain Figaro’s face, my main subject.
That said, I didn’t crop as much as I normally would have because I wanted to retain some of the foliage to enhance his eyes.
This created extra work for me… many additional stitches, but ‘There is no limit to true love’, is there?
I also lost some detail in Figaro’s fur and facial expression but I’m still delighted with the result, as it still does justice to the photo, don’t you think?
- The other advantage of cropping is that it allowed me to reduce the number of colours I used.
A photo has thousands of different colours, which again are impossible to reproduce in cross-stitch. We can use up to 70 colours for this type of project, which would end up being tedious and would only reproduce a small fraction of pixels, without mentioning the cost!
- Finally, I edited my photo to make it sharper; I enhanced the colours, kept the contrast high and corrected the luminosity.
In short, I optimized my chances for a good conversion.
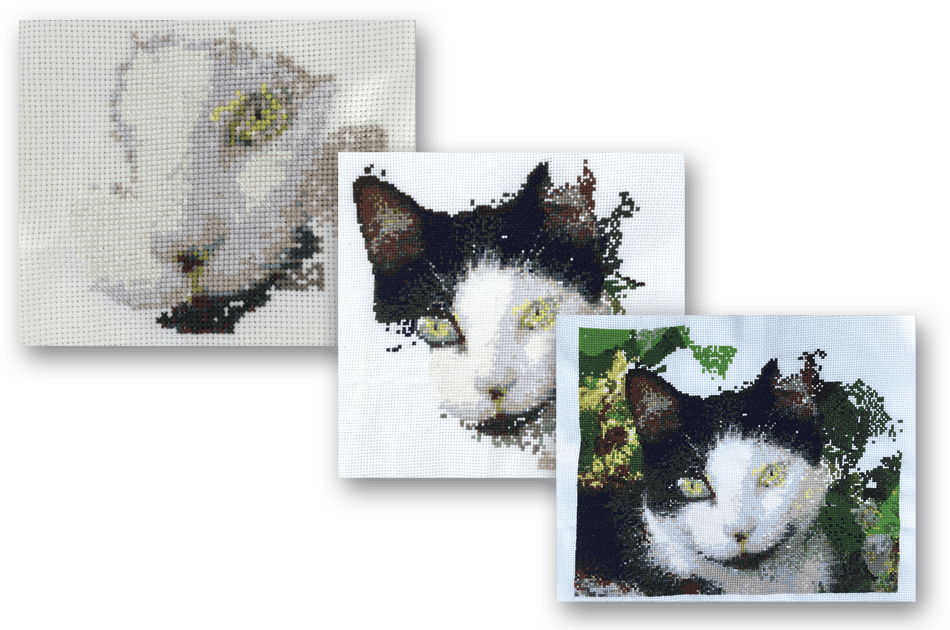
The cross-stitching of Figaro took me 6 weeks during which I worked several hours in a row…
The secrets of a successful photo conversion to cross-stitch
As you just read in the example of Figaro’s photo conversion, it is necessary to make a few small tweaks to your photo before converting it to cross-stitch.
- I’m creating all my standard cross-stitch patterns for Aida 14/16/18/20 and recommend using Aida 18 for a bespoke photo conversion, as it comes out fine in terms of detail and pattern size.
That said, I can create your bespoke photo conversion for higher cloth counts such as Aida 20/22/28.
You’ll find these online on Amazon, Etsy or by typing Zweigart (which manufactures – and invented – Aida cloth.)
It is undeniable that the higher the count, the better the photo will convert to cross-stitch.
However, remember that working on these high-count fabrics will mean thousands more stitches, many different colours of floss, more expense and a lot of patience.
I can also convert your photo for a lower count (i.e. Aida 14), but your pattern will have to be much larger if we want to recreate more details. It’s not really ideal.
I design for white Aida by default, but you can decide to buy Aida ecru, blue or black, which can create terrific special effects or style.
- Will any photo do?
In theory, any photo could do, but converting it to cross-stitch requires some preparation.
As you read above, each inch of a photo is made up of thousands of pixels.
We can’t obviously reproduce them all because cloth (even high count) has a very limited number of stitches per inch.
The other drawback is that a photo also has thousands of different colours, which again are impossible to all reproduce in cross-stitch. We can use up to 70 colours for this type of project; this is a significant number that can make stitching tedious and expensive.
- We need to tweak the photo to optimized our chances for a good photo conversion.
The first thing is to give precedence to the subject by removing the background, or at least reduce it as much as possible.
A busy background will result in a lot of unnecessary stitches, so extra work; it will also require a greater number of colours, therefore threads (keeping the background on the photo conversion of Figaro was my choice).
So we crop our photo!
Once cropped, we edit it to make it sharper; we enhance the colours, keep the contrast high and correct the luminosity.
We also need to reduce the number of colours in the cross-stitch and/or simplify them by merging similar colours into one.
Despite all this tweaks, you can see in the photo conversion of Figaro that I was able to retain a wealth of detail and preserve my main subject.
N.B. Please note that I’m not designing for linen, but you can adjust my bespoke patterns for even-weave, and in this case will need to work out how much cloth you need. If you stitch over 2 threads (the standard way with even-weave), you’ll have to divide the count of your cloth by 2 to work out the size of your project. For example, if you’re aiming at the same design than Aida 16, you’ll need a 32-count even-weave (32 ÷ 2 = 16).
I hope I interested you in a conversion of your favourite photo to cross-stitch.
Happy cross-stitching to you!


