

Less is better, so I made my counted cross-stitch patterns PDF as simple and user-friendly as possible.
The introduction/welcome page sets you out the PDF’s different sections:
- A multi-page grid chart with black symbols
- A symbol key
- A thread listing and quantities required (DMC, Anchor or Madeira)
- Instructions of how and where to start stitching
- A page map
Feel free to screen-shot the computer-generated impression of your completed cross-stitch pattern from the shop site.
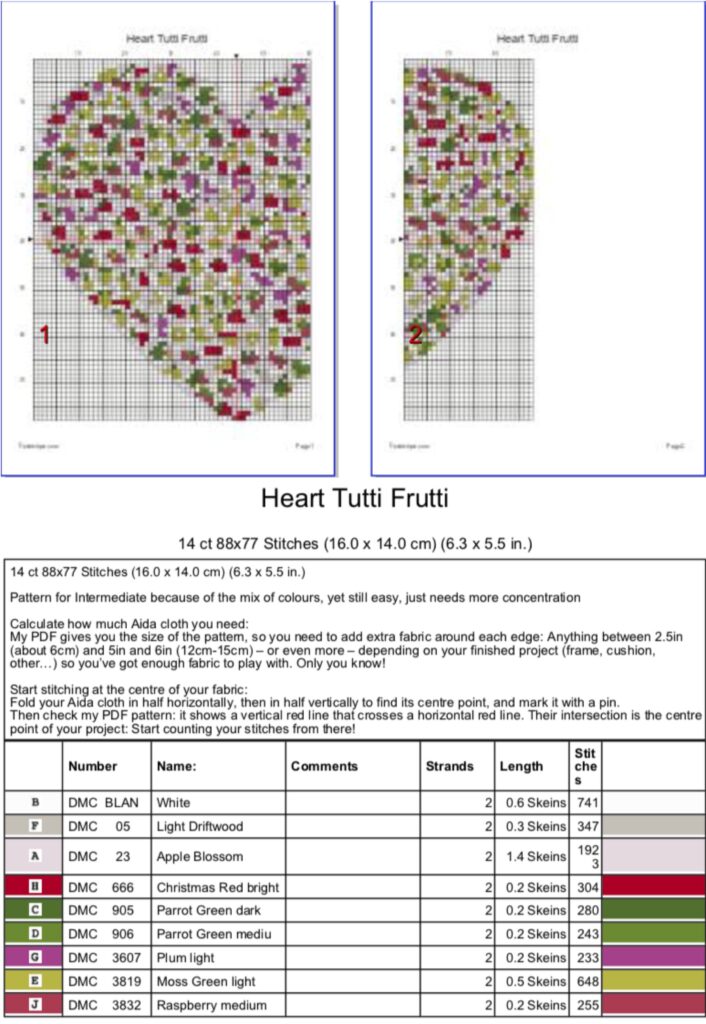
My Tutti-Frutti Heart’s coloured page map with the two red lines that mark the centre of the pattern, and instructions on how and where to start stitching
Find where to start stitching on my cross-stitch patterns PDF
The next step is to visit your nearby haberdasher to get a piece of Aida cloth, the recommended colour threads, tapestry needle and any other cross-stitch equipment you don’t already have. Or simply order online.
You’re now all set to start stitching, but are wondering:
- Where should I start cross-stitching?
Easy, you start at the centre of your fabric!
Fold your Aida cloth in half horizontally, then in half vertically to find its centre point, and mark it with a pin.
When you look at my cross-stitch patterns PDF, you can see that each group of 10 squares is regrouped in a larger square, which is delineated in thin black lines. This is where you can see the number of stitches.
You can also see a vertical red line that crosses a horizontal red line. Their intersection is the centre point of your project.
Start counting your stitches from there!
However, on some designs (i.e. my wreaths) the centre point is on the stitch-free section of the cloth, but you’ll still have to count from that point. It’s easy, just requires a bit more attention.
- Your next question: How do I calculate how much Aida cloth I need?
My PDF gives you the size of the pattern, so you need to add extra fabric around each edge: Anything between 2.5in (about 6cm) and 5in and 6in (12cm-15cm) – or even more – depending on your finished project (frame, cushion, other…) so you’ve got enough fabric to play with.
Only you know!
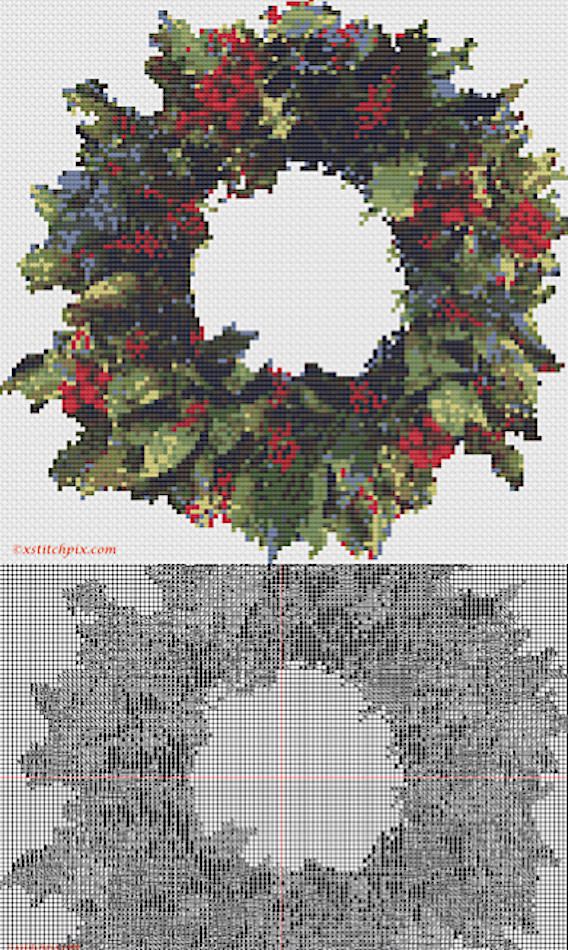
Computer-generated image of the finished project ‘Christmas wreath with holly’ which is one of my cross-stitch patterns PDF where the two red lines cross on the stitch-free cloth
Tips and and tricks for my cross-stitch patterns PDF
I certainly don’t pretend to know everything, but I want to share with you some cross-stitch tricks I discovered over the years.
I find it easier to mark the stitches (squares) with fluorescent highlighters on my printed PDF as I stitch them. It helps me keeping track of my count.
But you can use any other method that works for you (i.e. cross them out in black…)
- I always work from the centre (the starting stitches) outwards to reduce counting errors, as it guides me.
N.B. In some of my patterns, the two red lines cross over on a stitch-free section of the cloth.
I’ve chosen to leave the centre point in place, so as not disturb the balance of the pattern and make you end up with a narrower side of blank cloth.
It’s easy to make a mistake and wrongly cut your cloth, even when you’ve been cross-stitching for a while. However, feel free to displace the red lines by redrawing them on the hard copy PDF.
Counting from a stitch-free point is not difficult though, it just requires a bit of preparation and attention before you start cross-stitching.
- I also work on blocks of stitches of the same colour at once, even if that means skipping a few stitches of different colours. I just make sure that I highlight them correctly on my PDF as I progress.
However, I never stray too far from my blocks to avoid counting errors (I find it really annoying to undo stitches and waste floss and time.)
This allows me also to work on a whole row of stitches at once.
This stitching method is known as ‘parking’.
A friend of mine likes to do ‘cross country’ stitching, when she does all the stitches of the same colour at once. Thumbs up for her (and all those who do it), but it doesn’t work for me because it requires way too much counting, which can be very tricky and to be honest quite boring.
- Annoyingly, threads get twisted and thinner as we stitch and therefore end up creating thinner stitches. This not only creates irregular cross-stitch but also exposes the weft of the cloth.
I have two ways to fix this problem. I either untwist my threads by regularly turning my needle in the opposite direction, or I hold my work upside down to let my needle hang down to untwist.
Please let me know your tricks, I’m always keen to learn and improve my method.
Thank you for purchasing one of my cross-stitch patterns PDF and Happy Stitching to You.


